
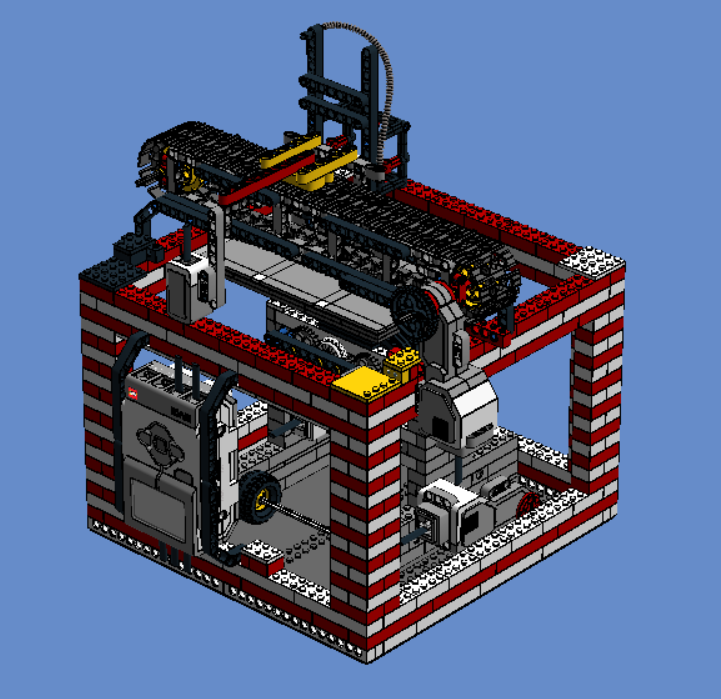
I built this printer in late 2015 when I was in 5th grade. It is a functional (although low-resolution) programmable 3d printer created with standard Lego Mindstorms EV3 components and a CreoPop 3d pen as the extruder. The printing platform is operated in the Y and Z directions with two EV3 stepper motors. The printing head is moved along the X-axis by the third EV3 stepper motor. The EV3 pressure and color sensors are used for automatic printer calibration, and for controlling the range of motion. The CreoPop pen extrudes gel-like plastic that it then hardens using UV light. I designed custom EV3 programming blocks for basic printer operations such as Init, Reset, MakeRectangle, etc. Keep reading to learn the story behind it and download the exact building diagrams in the Lego Digital Designer format.
Inspiration
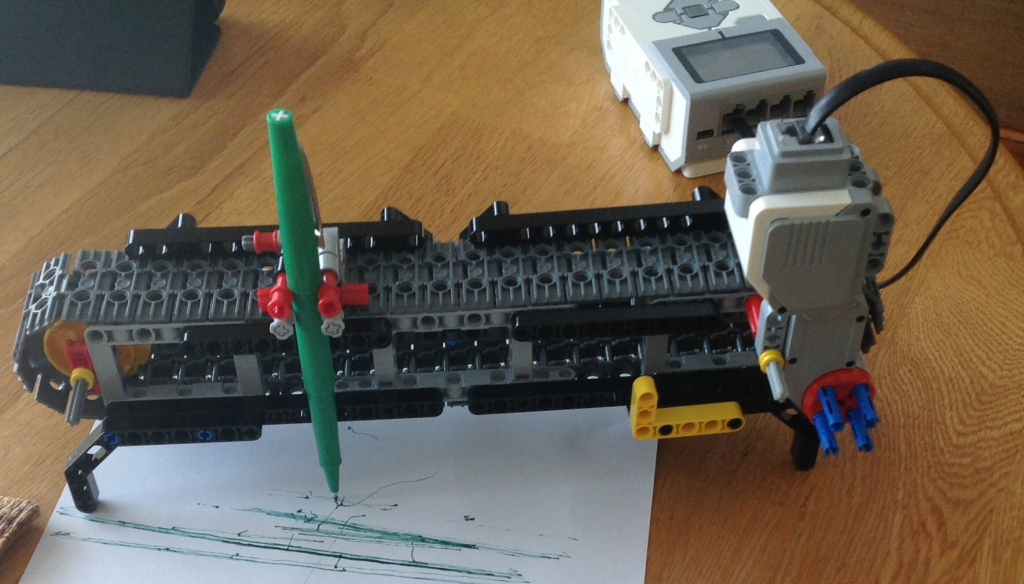
At first I didn’t think I would actually build the full printer. First, I built a plotter – basically a 2d printer that would move a regular pen on paper creating flat drawings. Here is my plotter, in the testing phase:
Once I got the plotter to work, I was inspired to actually build a working 3D Printer. The first of my experiences with 3D Printers was at a STEM summer camp at Robinson Secondary School here in Burke, Virginia. That helped me get a basic idea of what to build.
Building the Base
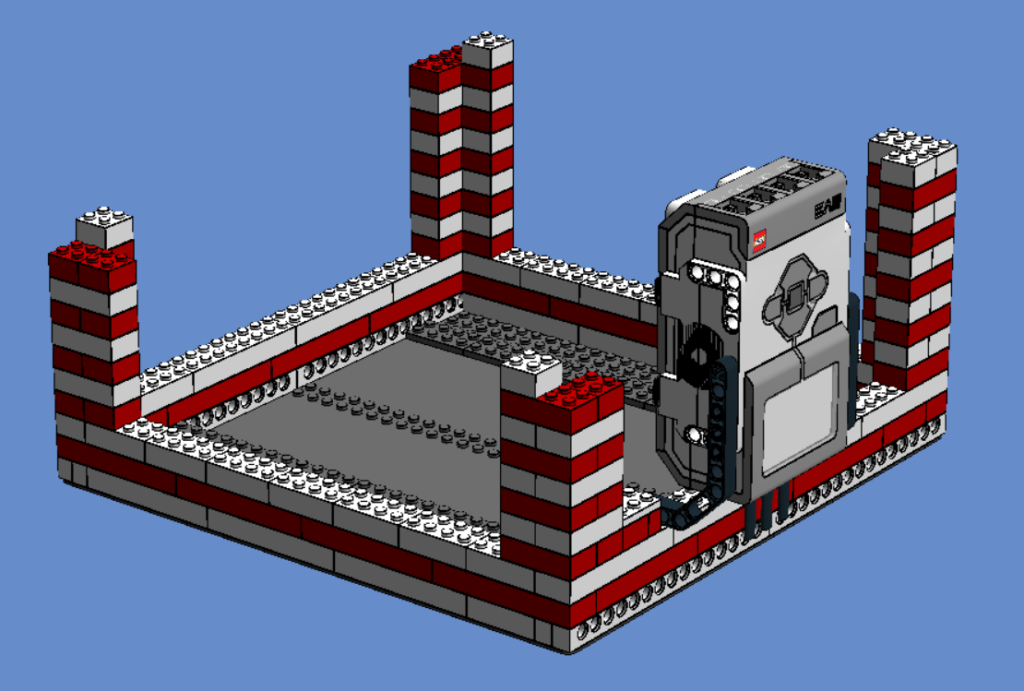
I picked the flat base plate from the Lego 3368 City Space Center set, and started to build the perimeter:
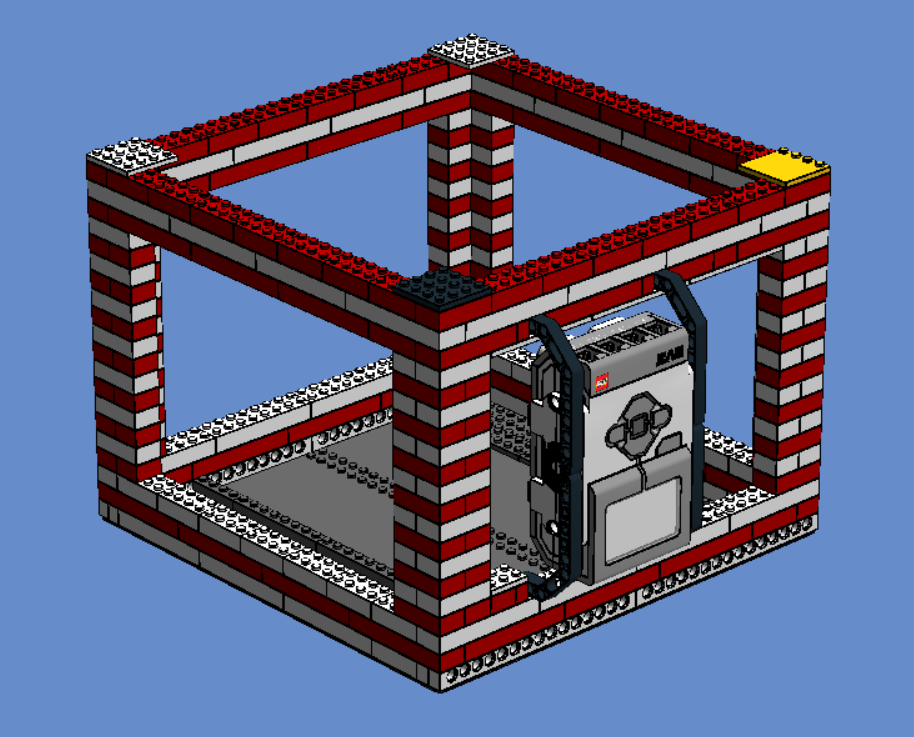
I attached the EV3 brick to the base with a couple of Technic pieces and a few pegs. Here is the picture of the full cube, assembled:
The Printing Bed
I had an idea to attach the printing bed to a square rod that would get pushed up and down along the Z axis, and have the base of the platform move back and forth along the Y axis.
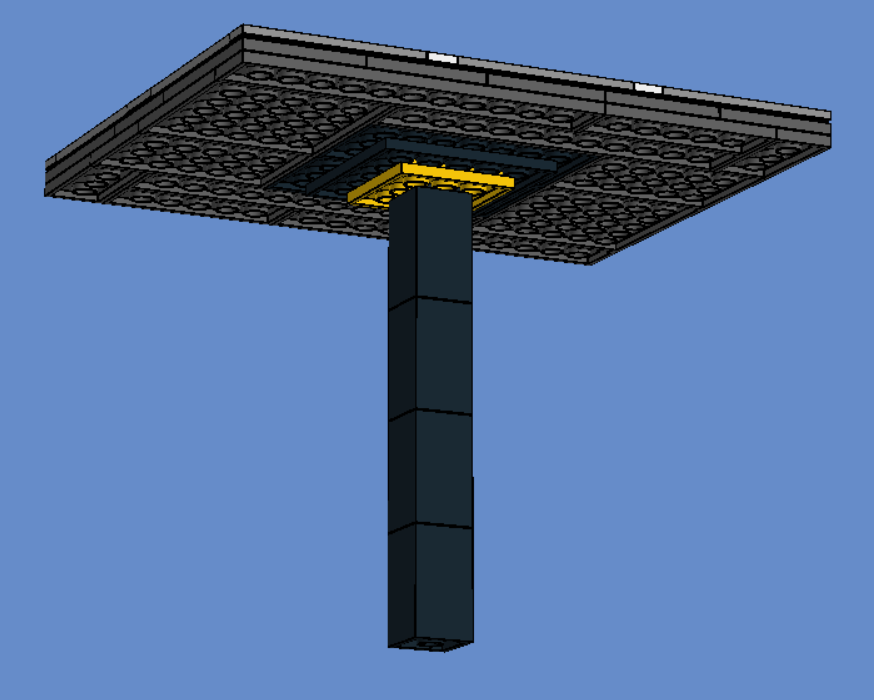
The printing bed is assembled out of thin Lego pieces and is covered with flat tiles. Here is the view of the printing bed from below. You can see the square rod attached to the bottom of the platform.
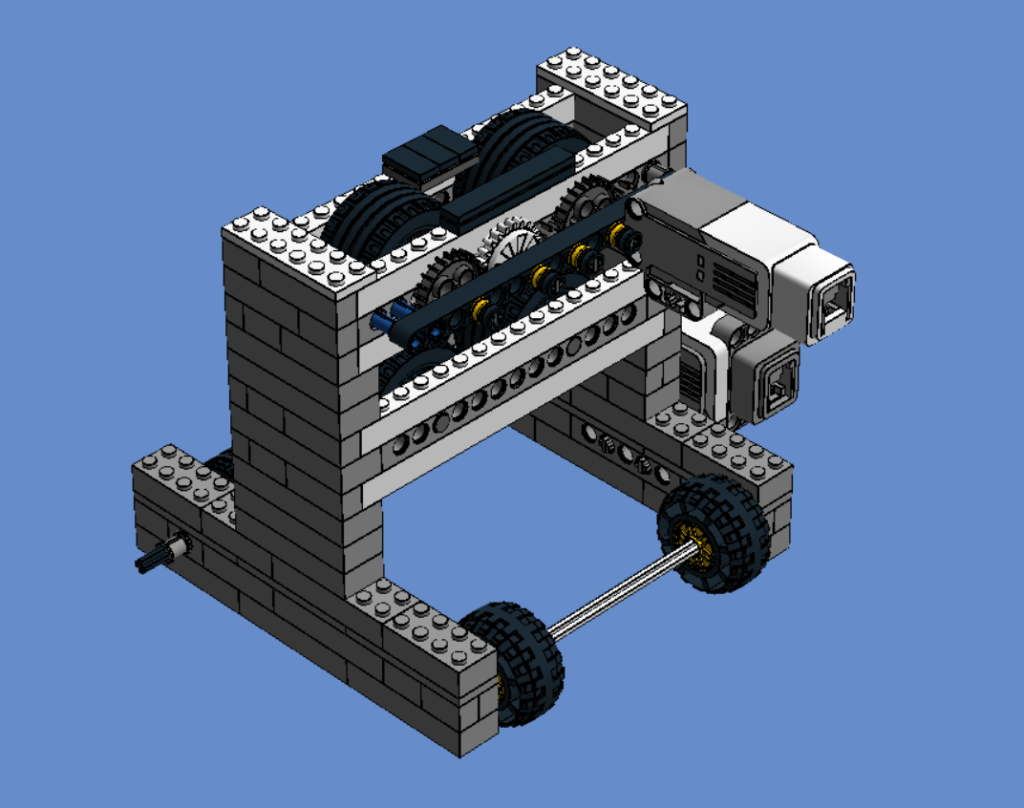
The square rod fits snugly between the two pairs of tires in the base of the platform, which is shown below half-assembled, with the large EV3 motor attached to the bottom front wheels through a long axle. The motor turns the wheels, moving the entire platform back and forth along the Y axis.

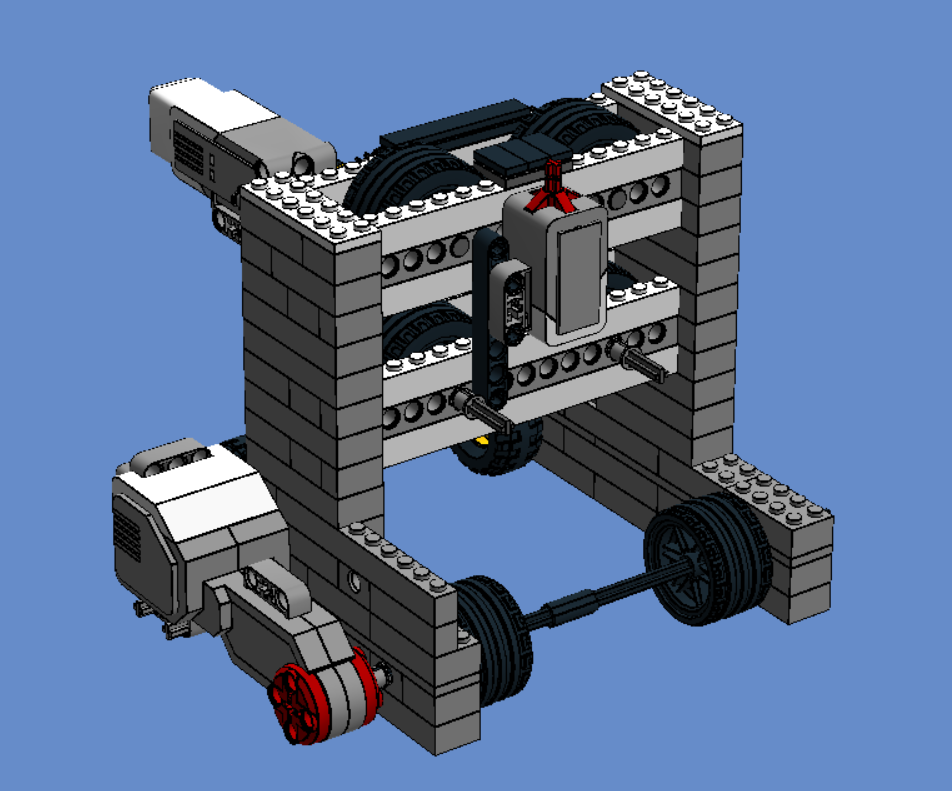
To make the motion along the Z axis stable, I added a second pair of wheels to the top. They are attached to the small motor from the EV3 set through a series of gears, so that both top wheels rotate in or out, to push the printing bed down or up along the Z axis. Here is the rear side view of the platform:
I also attached an EV3 pressure sensor on the other side. The sensor is used as an end stop sensor for the Z axis, to detect when the printing bed reaches its lowest position.
The Gantry
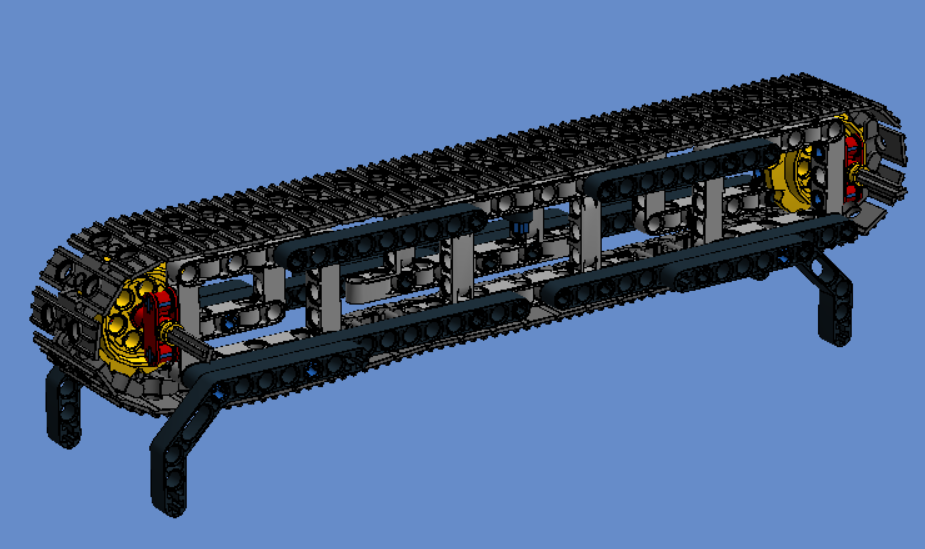
Minor modifications to the plotter were required to fit it on top of the printer. Here is the close up view of the gantry, without the motor:
The Pen Holder
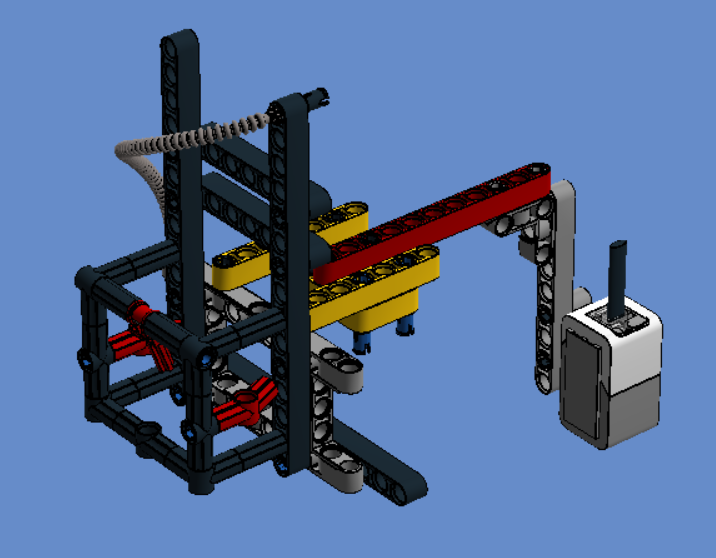
The Pen Holder is a crucial part to the printer. The red angled pieces hold the 3D pen of your choice securely in place. The Pen Holder also features the X-Axis End stop. The end stop, a color sensor, reads a color bar on the frame to know when to stop.
The Whole Printer
The Printer is finally done! You can see all of the parts put together how they should be!
The Programming
The Main Program
The program for a rectangular prism is surprisingly long. I used the Lego Mindstorms programming application. The custom blocks I created were Init, InitAndPrepare, Rect, and Lowerer.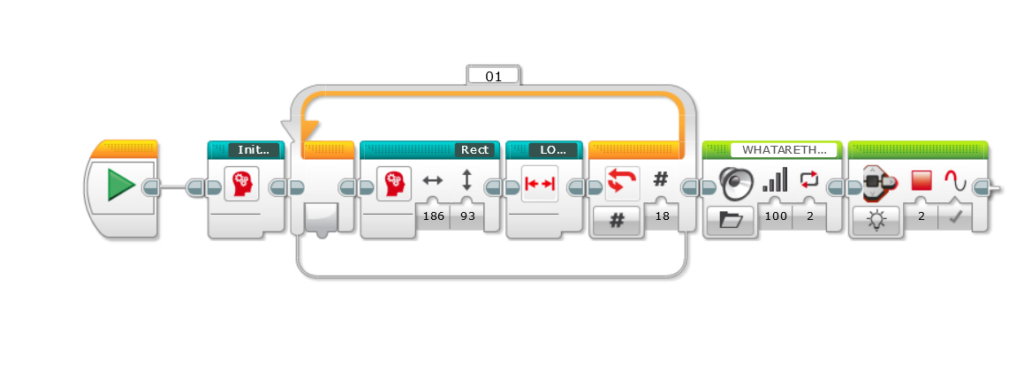
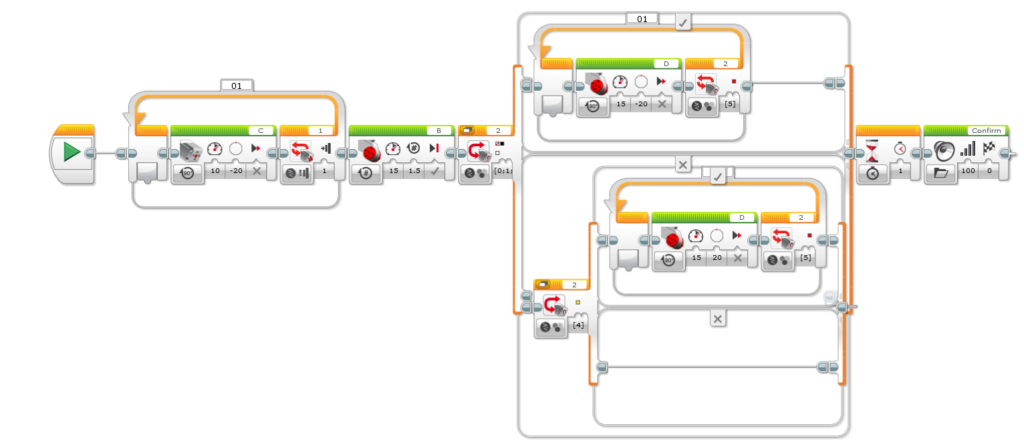
Init and Prepare
InitAndPrepare initializes the printer. When I was building, I realized that I should make the printer calibrate itself every time it prints for improved accuracy.

Init
Inside of InitAndPrepare you can see Init. Init Initializes the position of the printing head and the platform along the X and Y axis. It uses the touch and color sensors to figure out the position of everything.
Rect
Rect is the program that actually controls the motion of the pen itself to create a basic rectangle. Rect only moves the X and Y axis. The Z axis is handled by lowerer. Rect uses variables to move the axis the same amount every time.

Printing complex shapes
The professional 3D printers use programming instructions in something called G-code. You can take a 3-dimentional model and generate G-code out of it by using an application called “slicer”. I will be enhancing the program to understand the G-code input. Stay tuned!
The printer in action:
Thanks for watching!